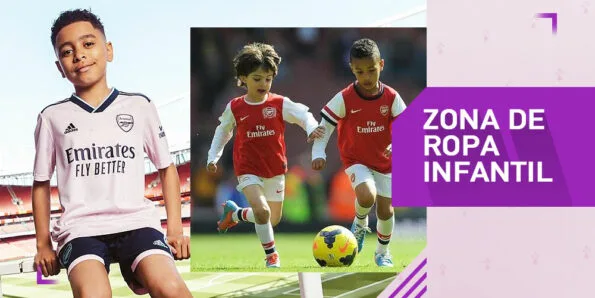
 |
 |
 |
|
Original Clasp
Katarra8
|
Original Chain
Katarra8
Now available
|
Snaps
Dritz size No.#2-Black
Local Fabric Store
|
Work in Progress
3/12/03
A lot of people ask me about my works in progress and to
see photos
of what I'm working on. I have been recently making this uniform
for a good friend of mine and decided to take some pictures of the progress..
Well only 3 turned out but there will be more to come..

This is my hard pattern for the Wrath of Kahn uniform. You
should always transfer
all your patterns into hard copies. saves you money in the long run and it
preserves well.

This is the back of the uniform. the fabric is folded in half with the wrong
side of
the fabric on the outside. Once you have traced it,... pin it, cut it then using
your chalk
mark what it is or place a big X..do not unpin. turn it over and do the same.
This will
help you identify the wrong sides of the fabric..

What you are looking at here is the center and sides of the back of the jacket
and the sleeves. I tend to when making this uniform to do the back and the
sleeves
first. They are the fastest part of the uniform to do..
The Back Belt loop
I've taken scans of the process involved in
making the back loop. most do this wrong..

start by pining then cutting out the loop

Sew all the way around leaving NO opening

cut the corners at an angle and cut a slit in the middle of the fabric..
ONLY ONE SIDE OF THE FABRIC. Make sure it long enough to
be able to turn the fabric inside out.

This is the loop turned inside out and the corners pushed so the seams are all
the way out.

fill with fiber fill. make sure you are getting enough in there and that its
really full
and all the way into the corners.

Hand sew the hole up..dont worry, this will be hidden but make sure it's
sealed all the way.

Turn over and machine top-stitch and wholla..you have your Loop.
One quick note though. This loop is hand sewn to the uniform. and don't worry
how
much fiberfill is in there. Yes it will look like a mini pillow but when you top
stitch
it will flatten down...
MAY 20 2003
Well the final touches are being made. the Turn clasp has been installed and
all
thats left is to seal and send. Well almost. Just an armband and belt loops and
this
bad boy is done...For anyone not seeing what the chain braid and snaps look like
here is a picture showing them.

As you can see?. this uniform has A LOT of hand sewing. Not only is the black
piping
half machine sewn but is also hand sewn down. not to say all the chains and
snaps that
need to be installed which a machine can not do. Don't worry about getting the
chain
100% perfect. there is really know way because of the nature of the links but
the originals
were not perfect either. BUT you do want to try and get it close to being
straight..
I had to lighten this photo a little. I think my monitor is
going out so some images
look dark to me and I wasn't really too worried about the color just the chain.
July 2003
Here's more pics

Click on the picture to enlarge
THE COLLAR
There has been some questions regarding the collar area of
the Jacket.
The jacket should come right up to the bottom of the tunic..But in most
cases it is not going to unless you alter your pattern to be smaller in the
neck.
Here is just a few examples of what I am talking about.
Click this picture to enlarge

In this picture the jacket is where it intended to sit around the collar
The next set of pictures are of the collar being wider than it should be


WOW thats extreem!!!!

I have found that the jacket seems to fit closer when the actor is seated.
Maybe because the actor is sitting on the coat tails and pulling the jacket
up
in the front...One thing you will notice is the height of the collar on some of
the actors.
It is my belief that they were created for dimensions..You wouldn't put a short
collar on a long necked person, it would make that persons neck appear longer.
Just
as you wouldn't put a higher collar on a person with a short neck. It would make
them
appear to have no neck at all...


More to come soon
If you have any questions,,,E-Mail me